One of the best ways to help you stay focused on your weight loss goals is to document and share your progress . . . and a great platform for that is through blogging!!
Blogging about your weight loss or health journey will:
-keep you accountable. If you know that people are watching you and waiting for a weigh in update or wondering what you ate for lunch, chances are you will make the right choices.
-helps you connect with others who are also making your same journey or WANT to make the journey. Chances are that they will inspire you as much as you inspire them and by having a supportive community around you, chances are that you will stick with your plan to reach your goals.
-gives you an outlet. Weight loss and fitness is HARD. There are days when you will want to throw in the towel. By expressing these feelings on your blog, you can better sort through your feelings and find the underlying issues. It’s practically free therapy!
-can also provide an additional source of income. So many people who have shared their weight loss stories have turned their blog into a part-time or full-time income . . . but whether you are in this to make money or not, I highly recommend starting a blog as the perfect place to document your progress.
So, let’s get your blog started!!! I have broken it down into easy steps and if you follow them, you will have a blog all set up and ready to go in a matter of minutes!
Some of the links included in this post are affiliate links, which means that at no additional cost to you, I will earn a commission if you choose to make a purchase. Thank you for your support in this way.
We have broken this process down into 3 easy steps:
1. Purchase hosting
2. Choose a domain
3. Install WordPress
After that, you will be ready to go! Let’s get started!
FIND A HOST
The first thing that you need to do is purchase hosting. A host provides server space for your website so that people can find you on the internet.
To explain it in simpler terms: if your website was a car, the host would be a garage (or a place to park your website).
We recommend getting started with a self-hosted WordPress site (instead of a free service like Blogger) because it gives you the most control over your site, make it look professional, set you up to monetize your site and it will save you headache down the road so that you don’t have to transfer everything over (which is what we had to do and it was crazy!).
Trust us – you will be grateful that you started out with a self-hosted site!
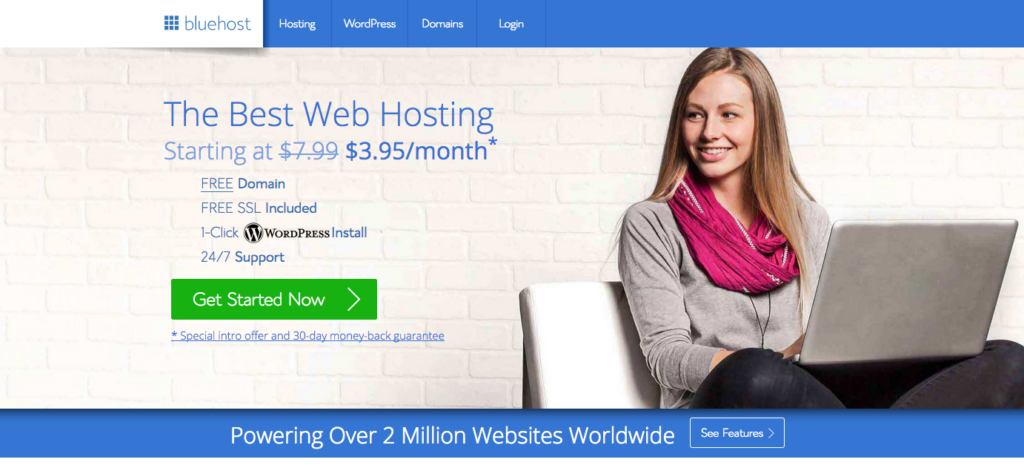
To get started, CLICK HERE TO GO TO BLUEHOST (this link will open in a new window, so you can still follow the instructions as you get set up).
We love Bluehost hosting because of how easy it is to get step-up, great customer service, quality hosting, and great prices – and it comes with a free domain name!
Click on the green GET STARTED NOW button.
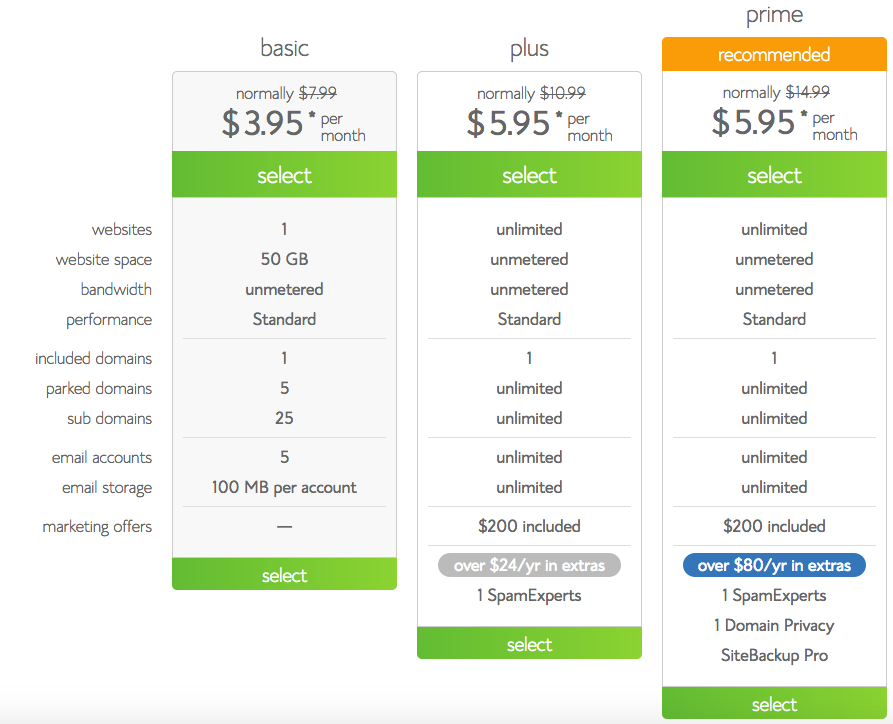
SELECT YOUR PLAN
The basic plan on Bluehost starts out at only $3.49/month, which is perfect for someone just getting started. However, the Plus plan does have some additional perks, so it might be something to look into. Whatever plan you choose, you can upgrade at any time and each plan does include a domain name, which is awesome.
Click the SELECT button on the plan you choose and move to the next step.
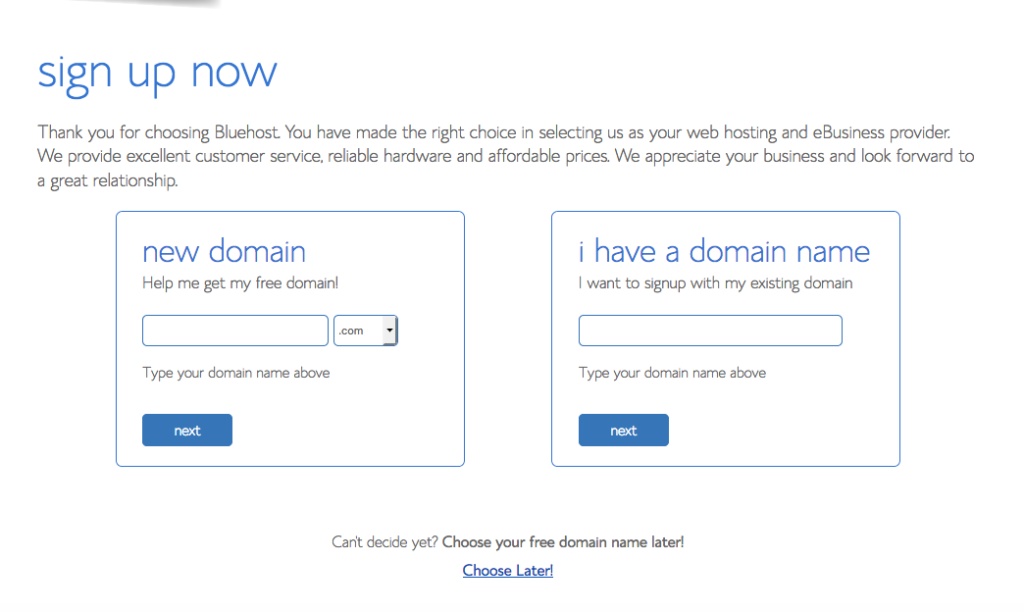
Now comes the fun part . . . you get to choose the web address of where people will find you! For me, my domain is www.Tone-and-Tighten.com. You can either choose a brand new name (enter it in on the left side) or if you already have a domain, you can enter that also (enter it on the right side).
As you choose your domain name, keep these tips in mind:
-try to use ‘.com’ at the end, if possible
-make it easy to say and spell
-keep it short
-make it memorable
-avoid numbers and hyphens, if possible (sometimes
Click the blue NEXT button.
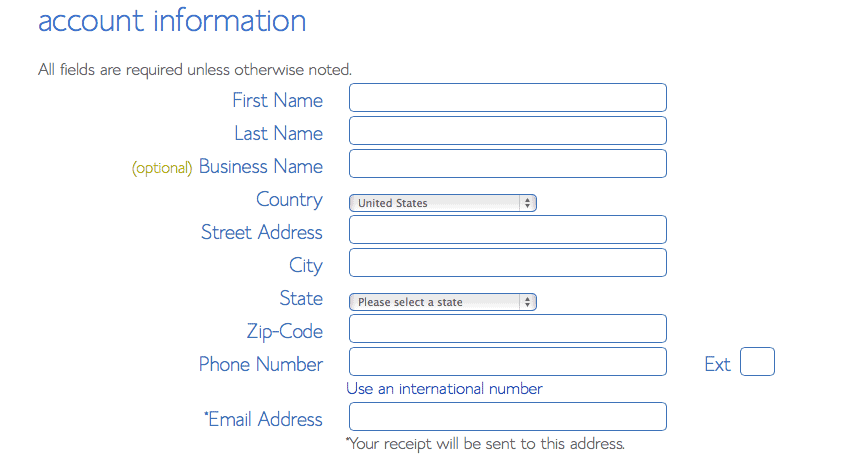
ENTER YOUR ACCOUNT INFORMATION
Make sure to enter in the correct email address, as this is where they will send you all your login info.
CHOOSE YOUR HOSTING PACKAGE
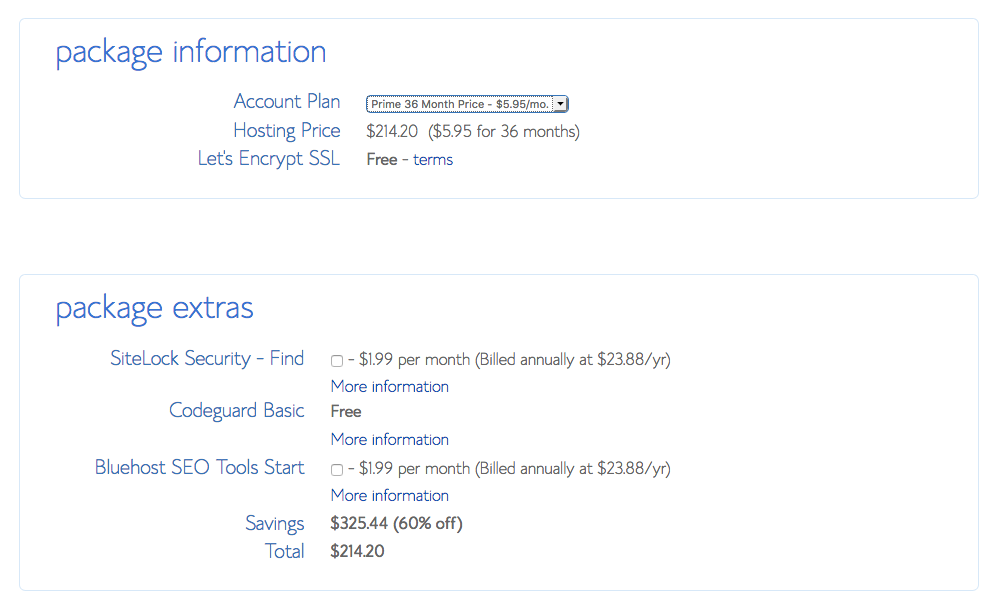
Choose your Account Plan from the drop down menu. Make sure that you choose a package based on how far in advance you want to pay. Keep in mind that Bluehost bills a year at a time, but it breaks down to be the best monthly price with the highest quality service.
Don’t worry about the add-ons . . . the only one that we would have you consider would be the Domain Privacy Protection, which keeps your personal information private.
ENTER BILLING INFORMATION
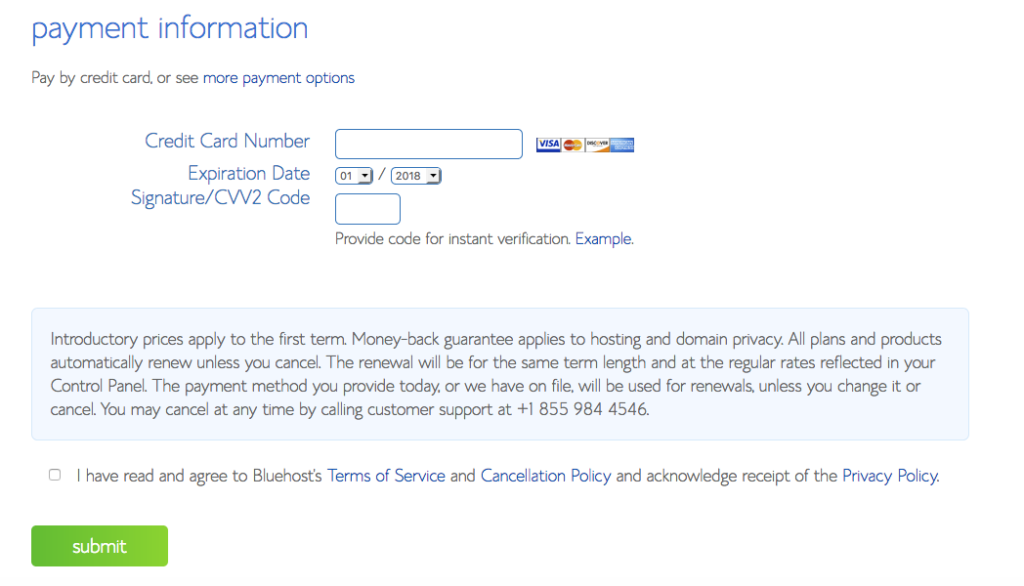
Put in your billing info, check the confirm box, and click on the blue NEXT button.
SKIP THE UPGRADES AND CHECK YOUR EMAIL
You will get asked if you are interested in any upgrades, just skip them for now. Check your email and you should find a welcome email from Bluehost. In that email will be your Control Panel (cpanel) Login info. Keep this info in a safe place!
Hooray! You have completed setting up hosting! You now own your own blog!

Now it’s time to install WordPress . . . I promise it’s easy!

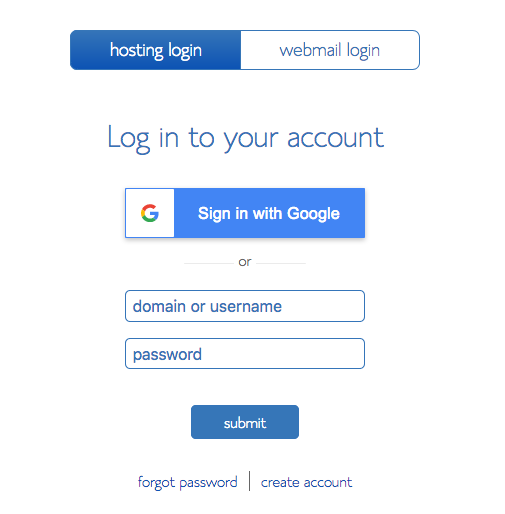
Login to your Bluehost and click on LOGIN in the upper right corner.
Enter your cpanel login info from the welcome email you just received. Make sure you are logging into hosting and not webmail.
INSTALL WORDPRESS
Bluehost just made it easier than ever to get started with WordPress. They actually eliminated a couple of steps in this process, so you’ll get through it in no time.
After setting up your password, you should be directed to select a theme for your WordPress site.
A theme is basically a collection of templates and style sheets that change the look and display of your website. Every theme is different and you may want a different one depending on your wants and needs. Your screen should look like this:
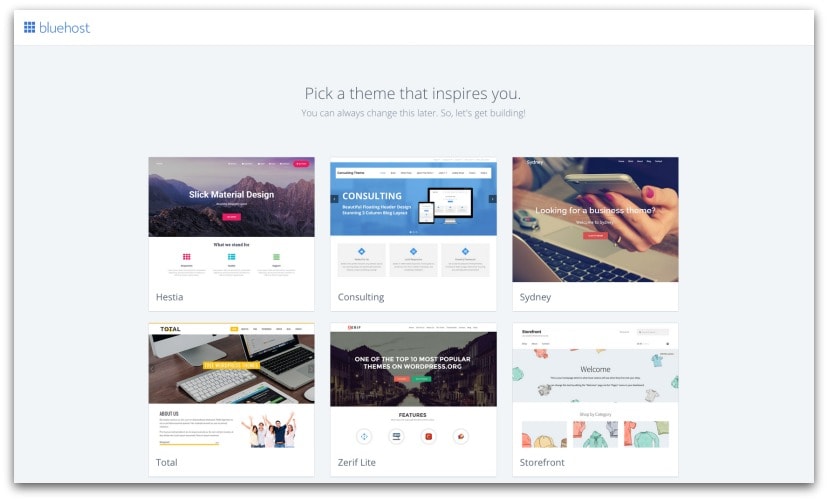
You can select any one of these free themes to get started. Don’t stress if you aren’t sure what theme to use – just pick one and you can always change it later.
First, we want to get you to the main screen where you can start to play around and customize things.
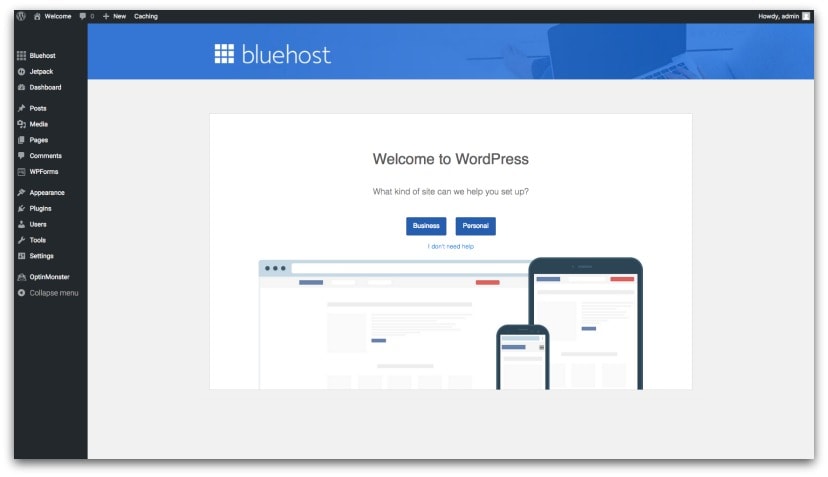
After selecting a theme to start with, your screen should look like this:
Select the “Business” option to be taken to the next screen (it doesn’t matter if you don’t have an actual business started yet – this is the first step in that process!).
You will then be taken to a screen that looks like this:
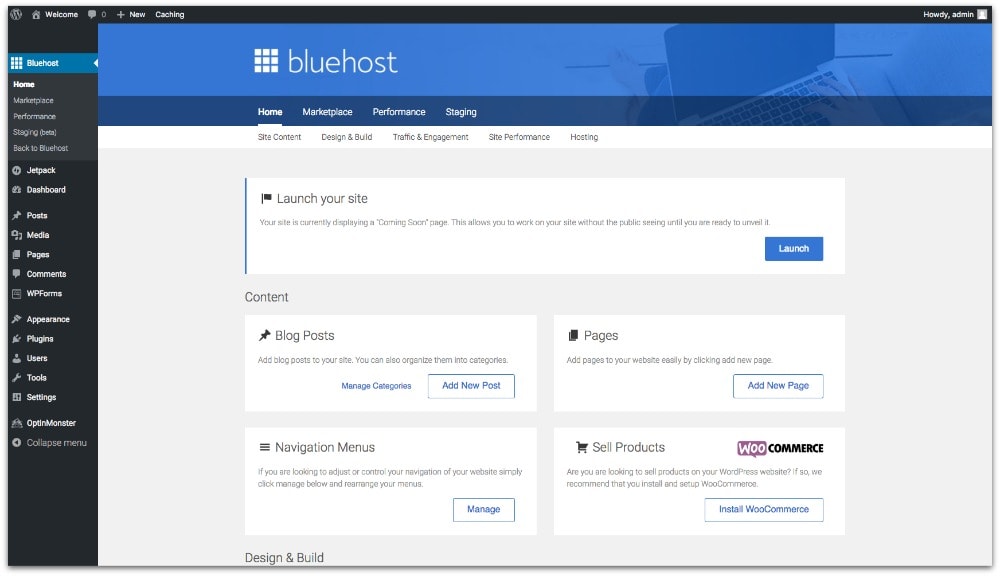
From this step, you can write your first post and start looking through the options in WordPress, but we recommend settling on a good theme first.
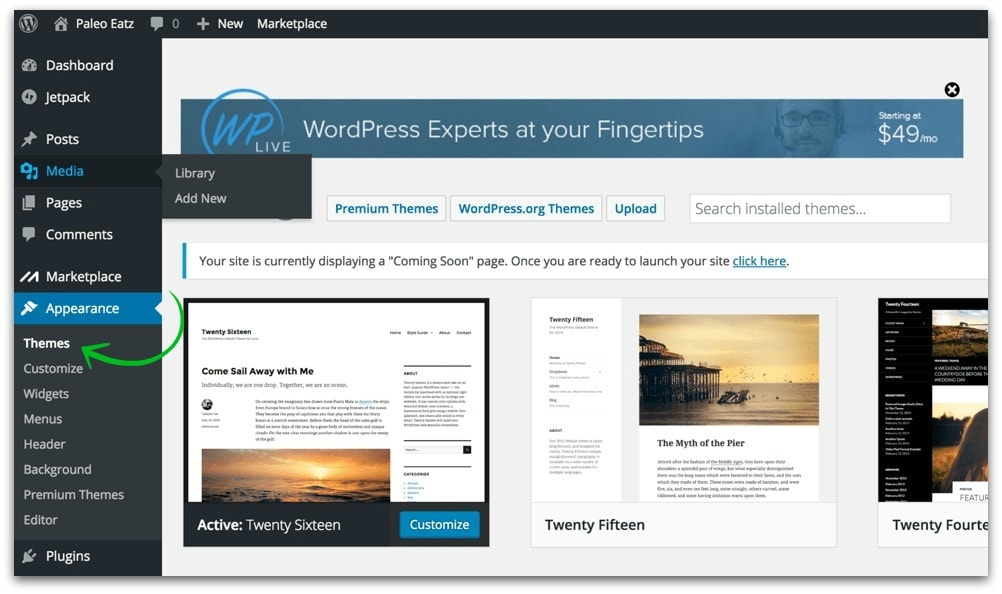
There are so many options when it comes to a theme. Simply activate a new one to see the changes – it is a lot easier to do this before you start posting to your blog, which is why I recommend that you pick a theme now.
You will notice that WordPress has a few free themes that you can choose from, so play around with those a bit to get started and find one that works for you.
Free themes are a great place to start if you’re a beginner blogger, but they will lack some of the tools a paid theme gives you.
If you free stretched at this point, we get it. Rock a free theme for a month or so and get used to the platform.
If you have an extra $50 – $100 to invest and want to get your blog looking the way you want it to in less time with fewer headaches, then go for a paid theme.
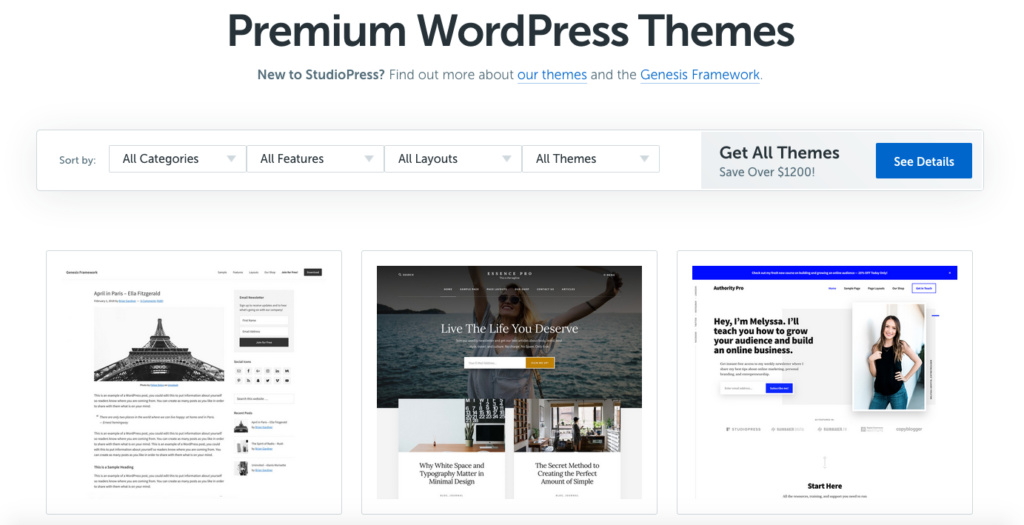
I personally use Genesis framework for my blog, which I got from StudioPress. I love how easy this theme is to use and make my own.
We are not website designers by any means and HTML code is literally a foreign language to us, so we stuck with something simple and used the Genesis Framework as a base.
Then to make it pretty, we recommend choosing a simple theme, like these ones from Designer Blogs. We have used Designer Blogs for a couple of projects and other websites and we highly recommend them.
They are very reasonably priced and will even install it for you for free, so it’s worth every penny!
Another great source for themes is Restored 316 – they have a great selection and are also reasonably priced with great customer service. If you are looking for a simple, clean, and beautiful design for your website, Restored 316 has some of the most gorgeous themes I have ever seen! They are pretty feminine, which may or may not work (depending on the type of site you are going for).
From here, it’s time to get to work. It’s time to share your story and inspire others to do the same!
Need help on where to go from here?
This post has been getting quite popular lately and people kept asking us for more help. They loved the walk-through but wanted to speed up the process to building and launching their blogs…
- When is the right time to launch my blog?
- How many posts do I need to start with?
- What should I start writing about and how can I improve my writing?
- How do I make my blog look as beautiful as I envision?
I sent out a survey and our thousands of readers were begging us to build a course on how to build and launch a successful blog FASTER.
You can absolutely build your blog on your own without our help, but the idea is to speed up the process and help you avoid the many mistakes newbie bloggers make when building their blogs!
At this point, you may be feeling a little overwhelmed, but I wanted to make sure you have every resource at your disposal.
For some of you, just start with the basics and start working through things yourself. For others, this is going to be the best resource EVER for starting a blog…
Introducing the MRM Academy – a course designed by successful bloggers for beginning bloggers.
Learn how to:
- Use social media (Facebook, Pinterest, Instagram, etc) to drive traffic and grow your site
- Create a brand
- Earn money from affiliate links
- Make money from display ads on your site
- Drive traffic using My Recipe Magic
- Secrets from blogging pros
- and more!!!
The course is usually $99, but you can get it here for only $9.95!
Click here to get the course:





Well your blog is simply amazing blog i read your whole article and i am in love with your content
thank you for sharing
What a kind comment! Totally made my day, Ramona! Thank you!
Jared