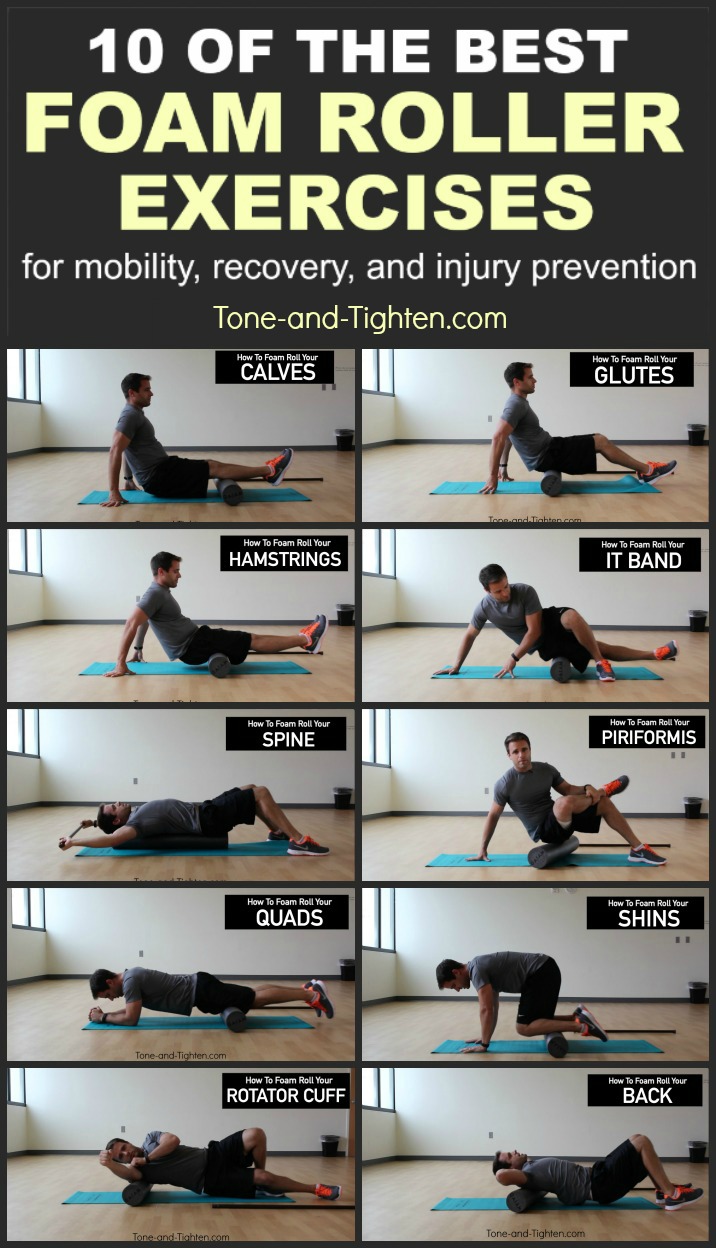
- Calves
- Shins
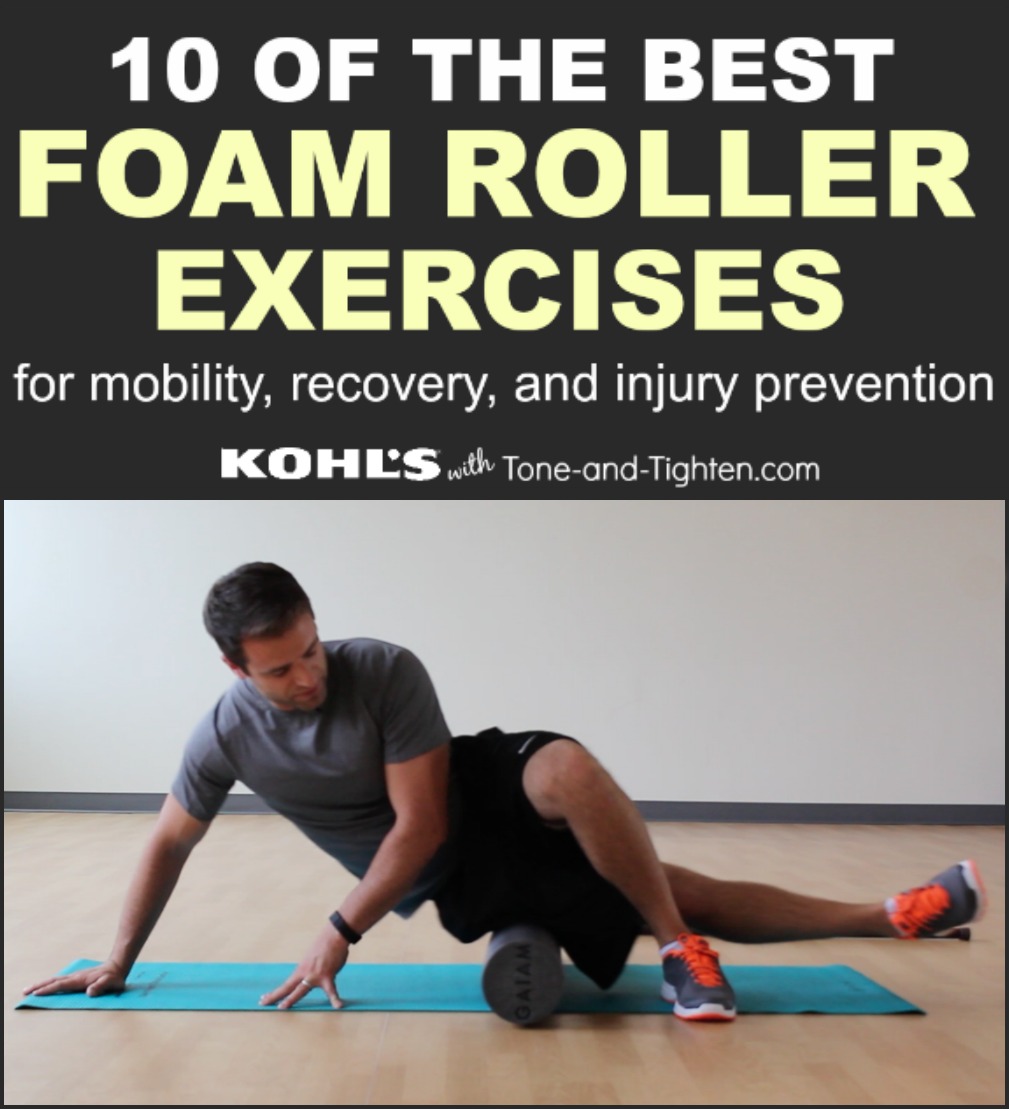
- IT Band
- Hamstrings
- Quads
- Piriformis
- Glutes
- Spine
- Rotator Cuff/Lats
Keep reading for a step-by-step guide of each of these foam roller exercises.
===========================
Eliminate guesswork and confusion and start seeing results.
Subscribe to Tone-and-Tighten.com and get our FREE “7-Day Workout and Healthy Menu Plan” delivered daily right to your inbox. CLICK HERE to get it.
===========================
When in doubt – roll it out.
As a doctor of physical therapy, one of the simplest and yet most valuable pieces of equipment that we have in the clinic is the foam roller.
This one simple tool offers numerous exercises with a myriad of benefits: increase joint flexibility, improve posture, injury prevention, and injury recovery (to name just a few).
Today on Tone-and-Tighten I wanted to share with you my 10 favorite foam roller exercises to improve your mobility, decrease pain, and help you to feel better.
WHAT SIZE FOAM ROLLER IS BEST?
A foam roller is an incredibly simple piece of equipment. It’s literally a cylinder of hard foam; although now you can find them made of plastic, rubber, etc. They come in a wide variety of sizes: anywhere from 4″-8” in circumference and ranging from 12″-36” long.
The one I prefer and that I personally recommend to my patients is 6” in diameter and 36” long (this one from Amazon is the one that I have in my house – my wife and I love it). I prefer the longer length because I find them a little more versatile – you can do a little bit more with them without the fear of falling off the roller.
It’s important to work hard during exercise, but with constant stress to your muscles, it’s also important to make sure you relax and recover when your body needs it.
Foam rolling is a great way to stretch and treat sore muscles. Foam rolling can help decrease pain and tightness, improve flexibility, prevent injury, and relieve stress.
You can use a foam roller on a daily basis for just 5 to 20 minutes, or start out with just a few days a week. You’ll notice a difference!
Now here we go – 10 of my favorite exercises you can do with a foam roller to keep moving, decrease pain, and stay injury-free. Personally I’m a visual learner – I shot this video for you guys so you can see what these exercises actually look like.
Watch the video below and scroll down for the written descriptions of each exercise.
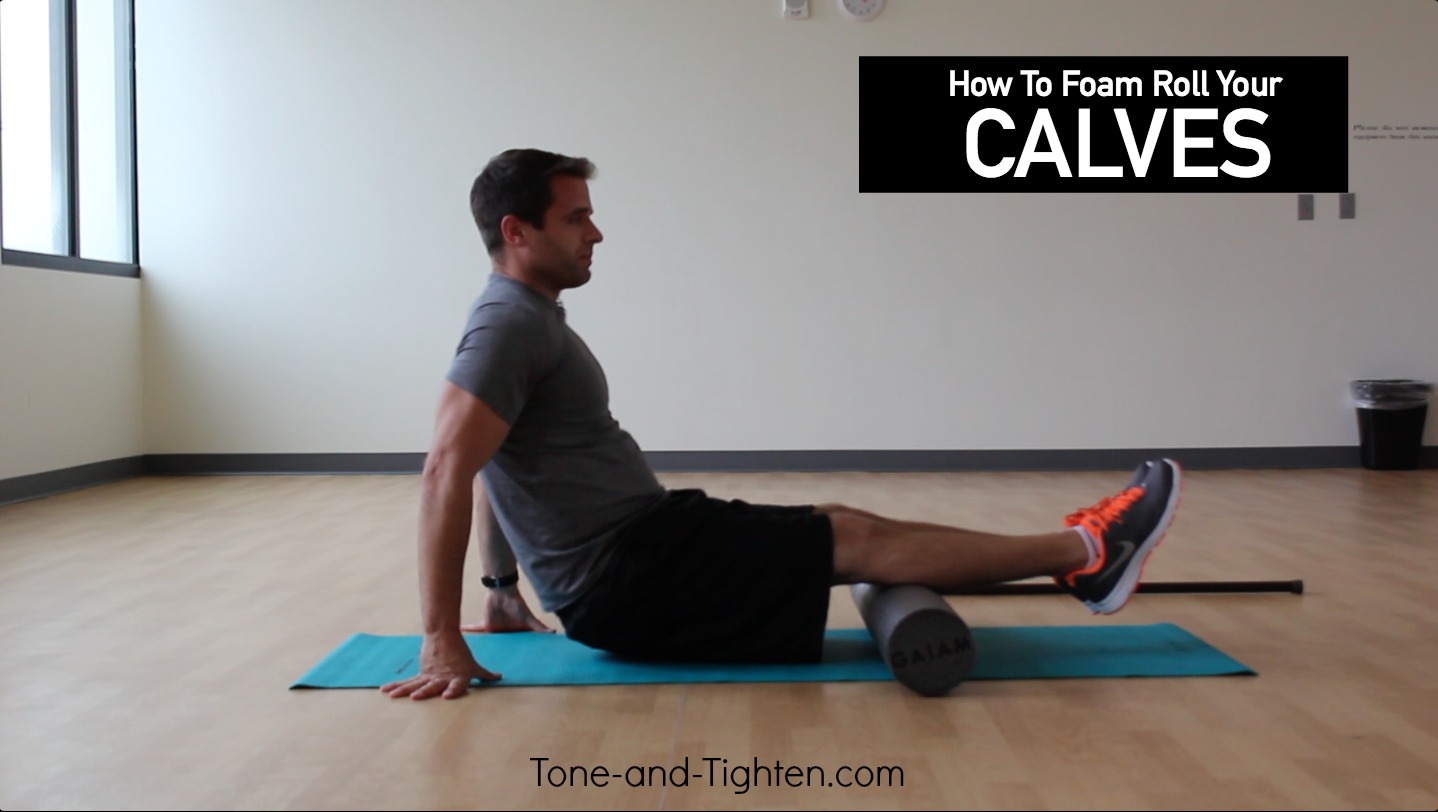 1. Calves –
Keeping your legs straight and using your arms and hands roll your calves up and down on top of the foam roller.
Can be intensified by crossing the non-injured leg over the injured leg to put more pressure on the injured area as you roll it up and down.
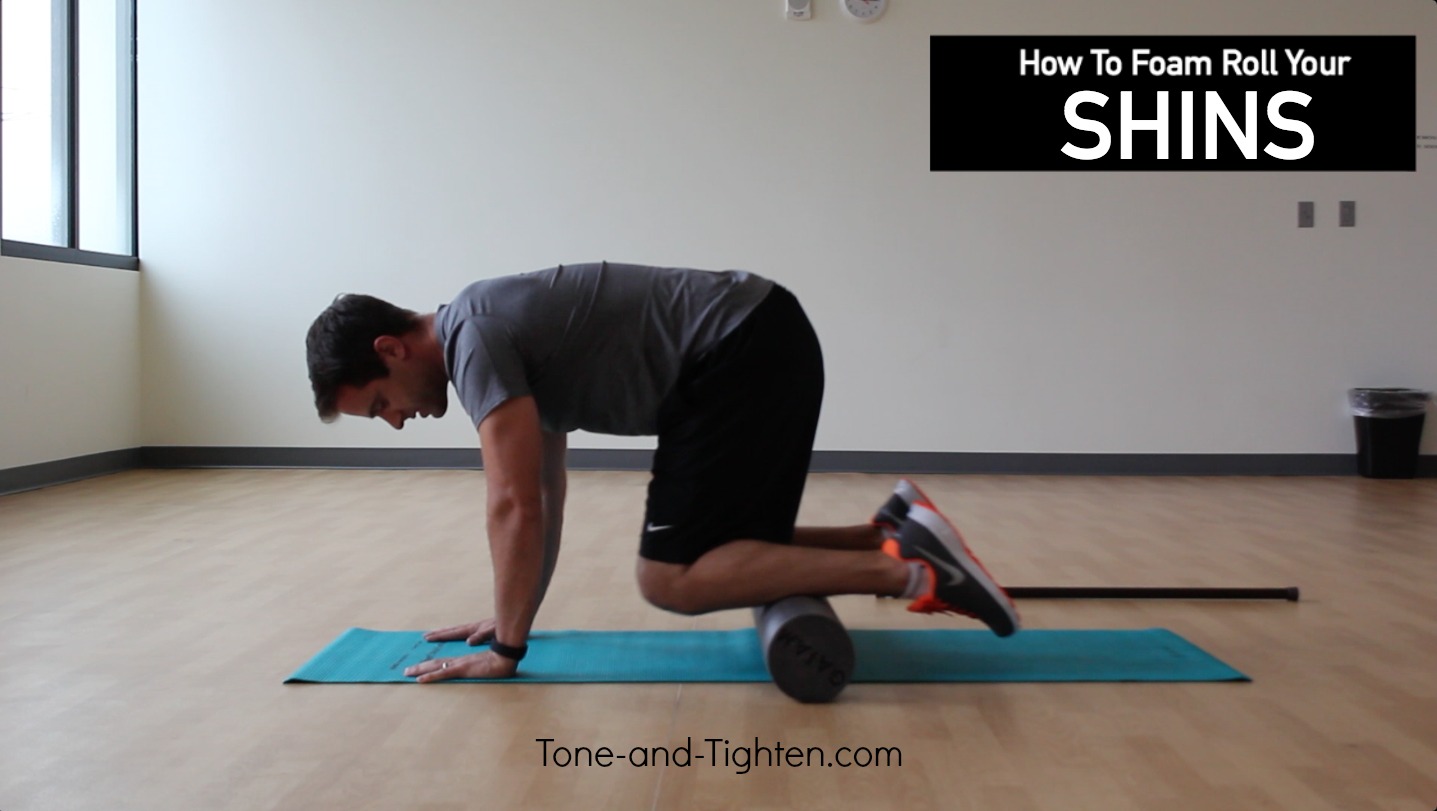 2. Shins –
Lift your knees off the ground and pull your knees up towards your hands and then push them back to the starting position.
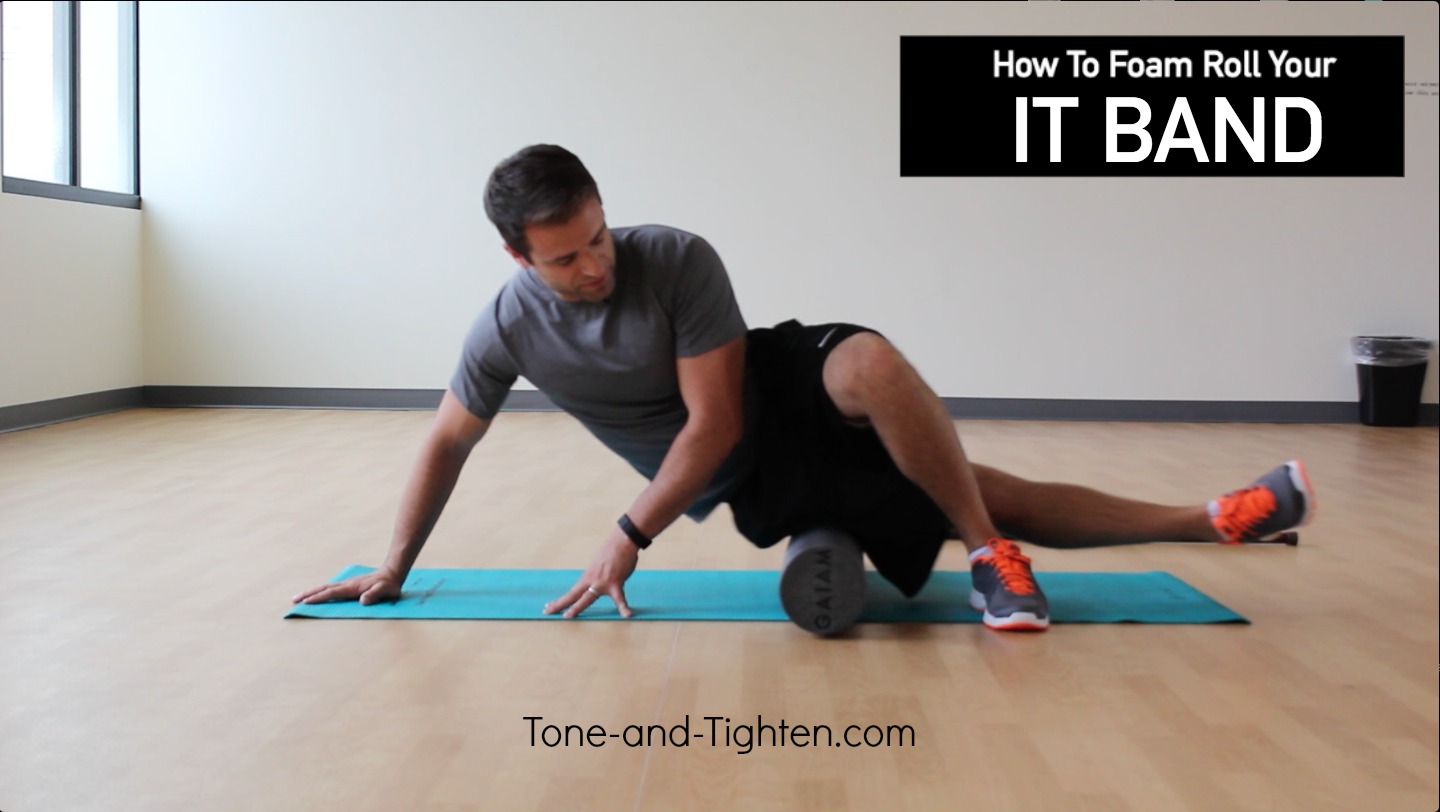 3. IT Band –
Cross your opposite leg in front with your foot flat on the floor; your hands are also brought in front and placed on the floor for stability.
Use your hands and leg (the one on the ground) to roll the outside of your bottom leg up and down on the foam roller.
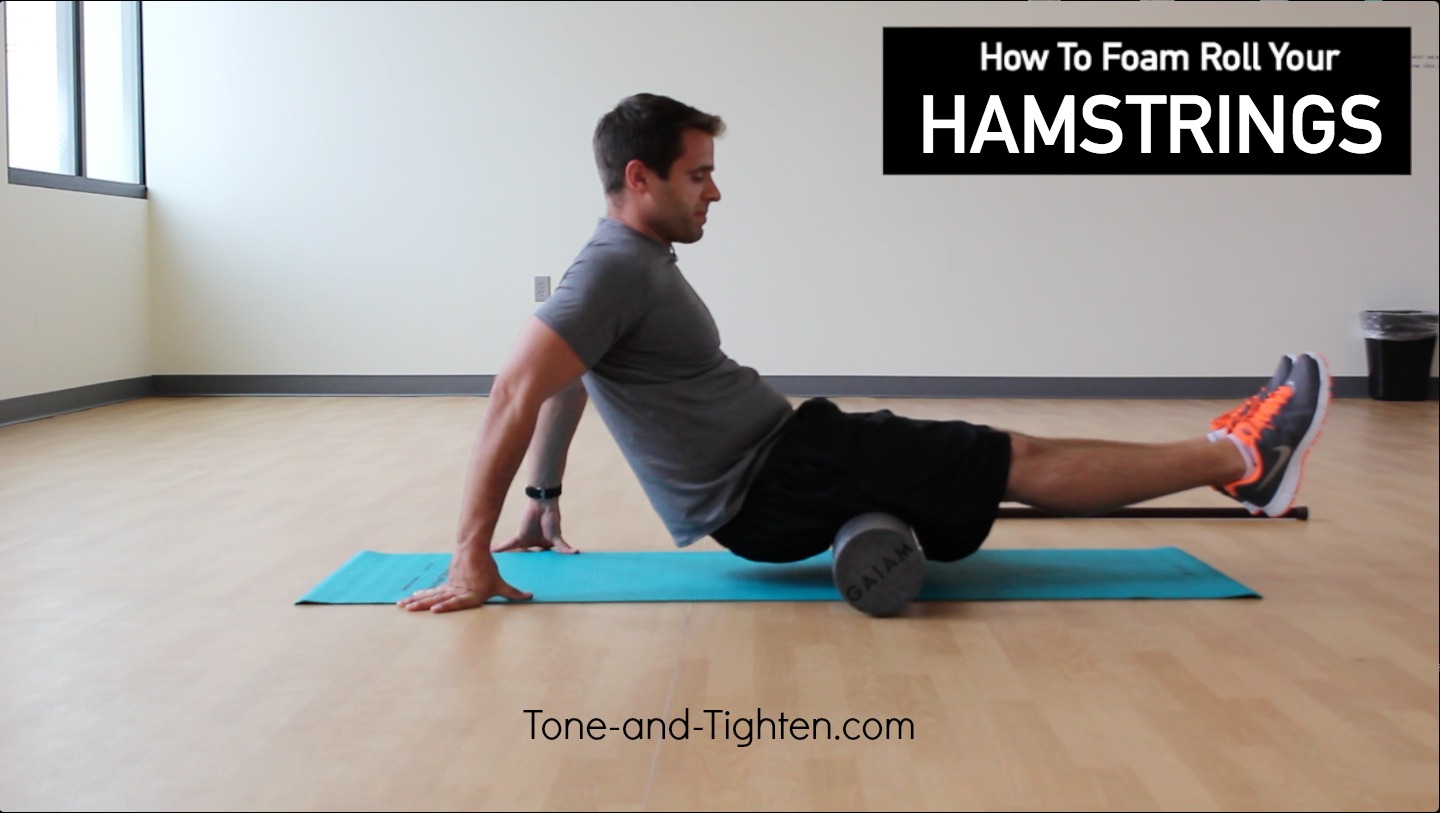 4. Hamstrings –
Keep your legs straight and use your arms to roll your hamstrings on the foam roller from the back of your knee to the bottom of your butt.
(You can target one specific hamstring by crossing the opposite leg over the top of the injured leg and performing the exercise as written).
 5. Quads –
 Use your arms/forearms to pull your body up and down with the foam roller traveling the length of your quad muscles from the front of your hips to the top of your knees.
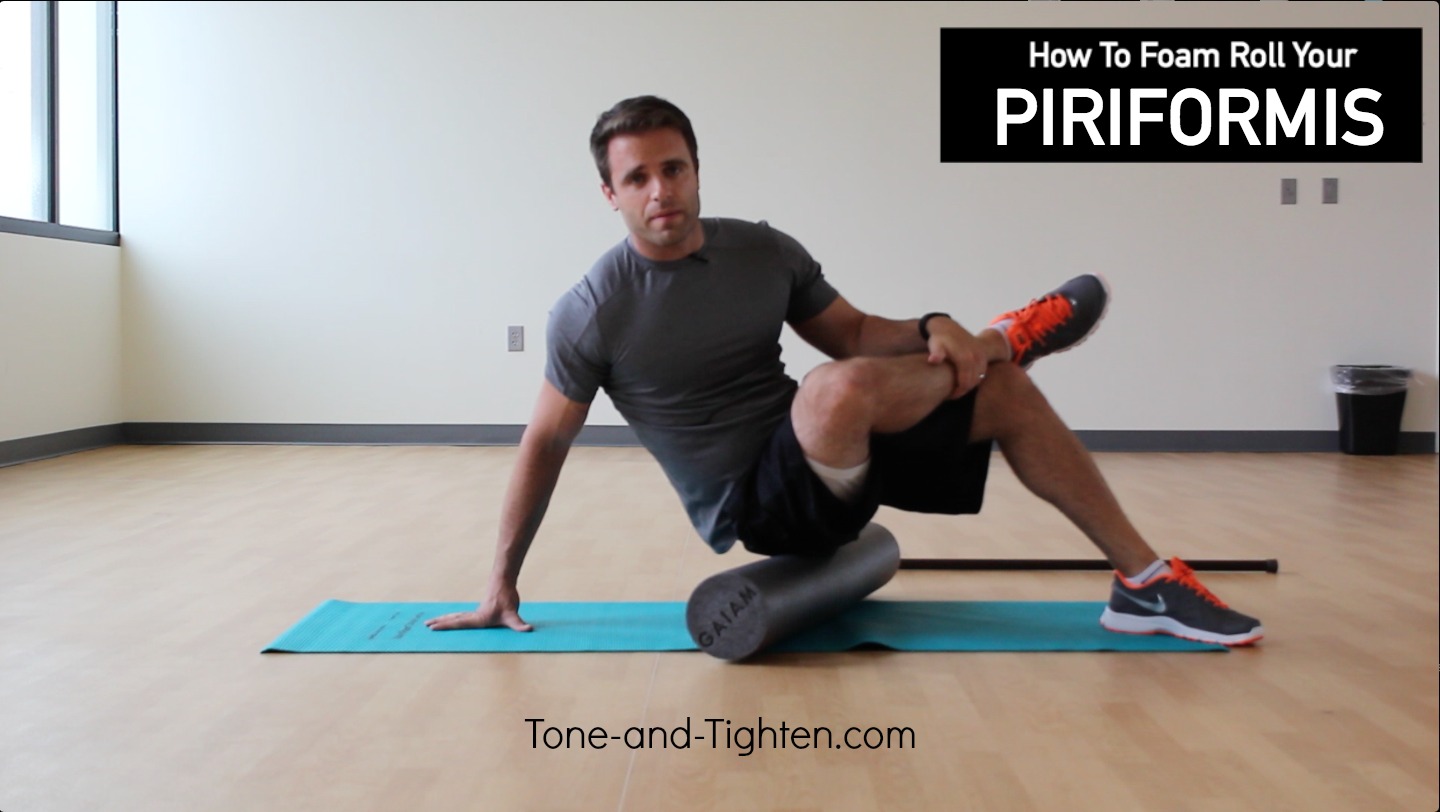 6. Piriformis –
 Cross your injured leg over your non-injured leg with your ankle just above your knee.
Roll your body slightly to the injured side.
Use your non-injured leg and both hands to roll your up and down your piriformis (one of the deep muscles of your hip – it’s deep to your gluteus maximus).
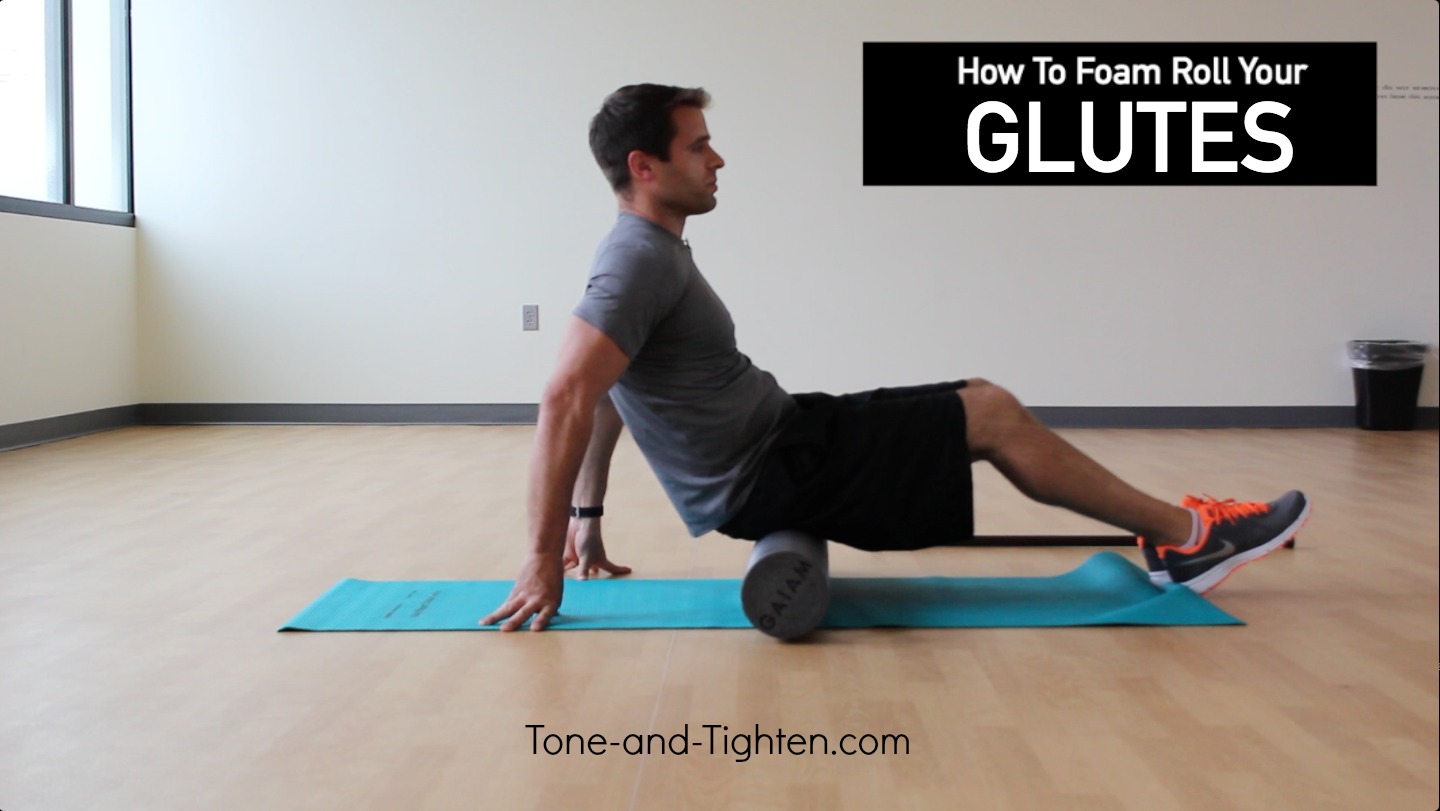 7. Glutes –
Your hands are also down on the floor as you semi-recline backwards.
Use your arms and legs to roll your butt up and down over the foam roller.
Hint – you can emphasize one side or the other by leaning your body slightly to the injured side.
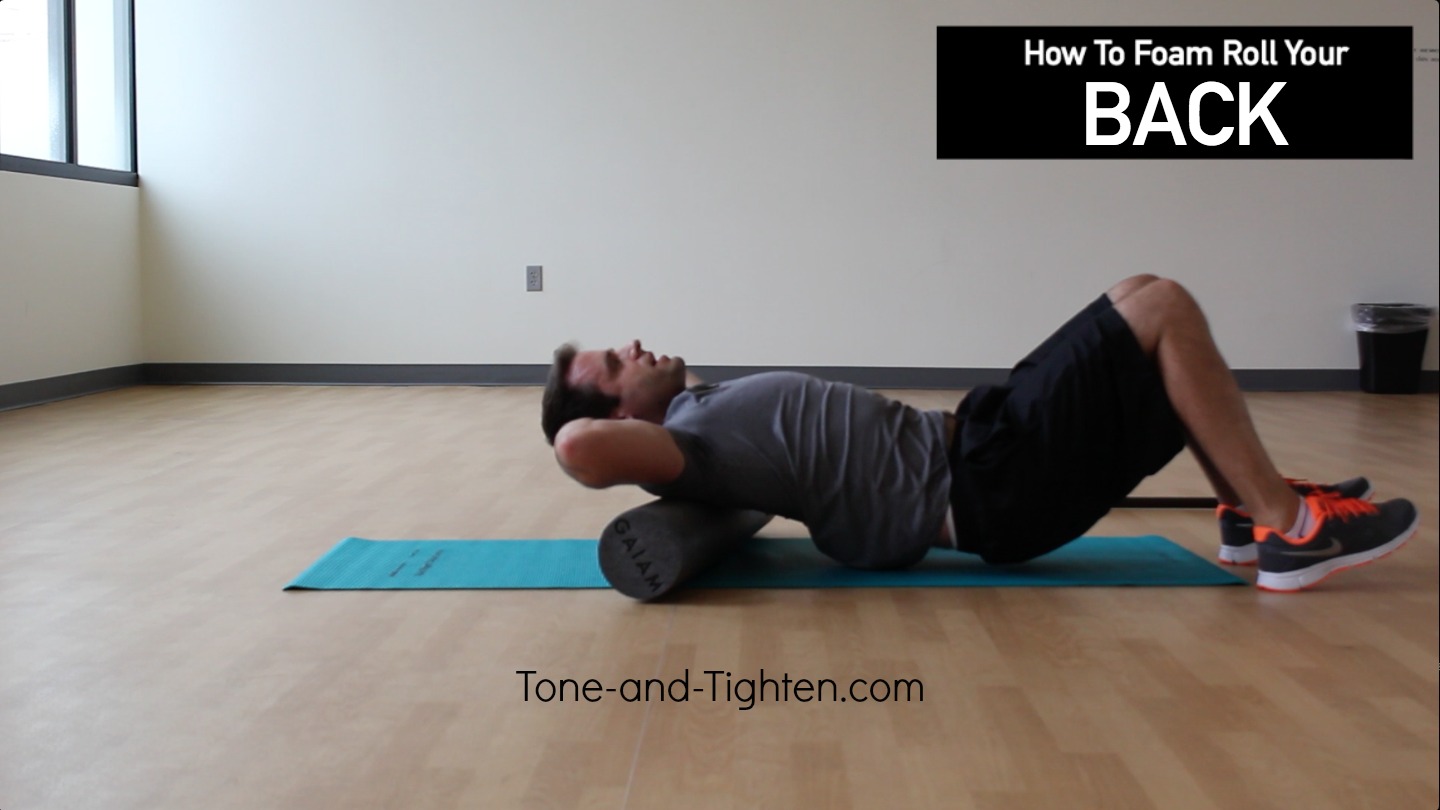 8. Spine (perpendicular) –
Lift your hips up off the floor and use your legs to roll your body up and down on the foam roller.
Try to relax your upper body and let your spine “fold” backwards over the foam roller to maximize stretching at each vertebrae
 9. Spine (parallel) –
 With your knees bent and feet flat on the floor, lay on the foam roller (so it runs the length of your spine).
Grab whatever rod you’re using and use it to stretch both hands high above your head and back towards the floor.
Hold 10 seconds and return to starting position.
 10. Rotator Cuff / Lats:
 Lift your hips up off the floor and, using your legs, roll on top of the foam roller up and down.
The foam roller should be right in the back of your arm pit / back of the shoulder / top of the latissmus dorsi area.
And that’s it. Between those 10 exercises that makes up about 90% of what I usually recommend on a daily basis for my patients to stay active and mobile.
Be sure to follow Tone and Tighten on Pinterest, Twitter,Facebook, Instagram, and YouTube for more workouts, recipes, and fitness tips.
Looking for more stretches from Tone and Tighten?
Post-Workout Cool Down Stretching Routine
Best Stretches For Low Back Pain
10 of the Best Stretches to Improve Your Flexibility
How To Stretch Out Tight Hamstrings